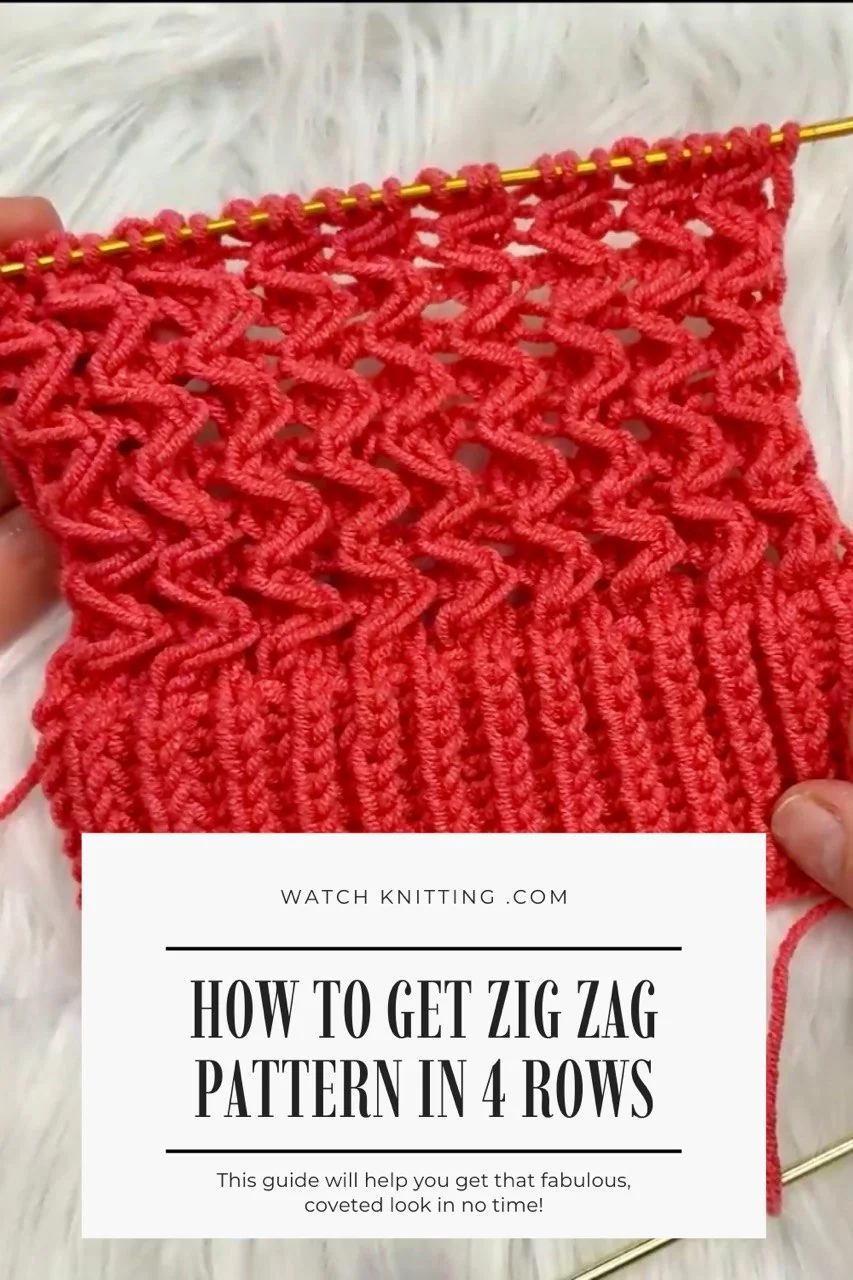
This vertical zigzag knitting pattern creates a bold, structured texture with a beautiful flowing movement ✨
The interplay between slipped stitches and twisted stitches gives this pattern its distinctive raised zigzag columns.
It’s a great choice when you want something that really stands out without being overly complicated to follow once established.
Pattern Instructions
Row 1:
Edge, P1, YW, P1, YW, P1; repeat, edge
Row 2:
Edge, Sl1, drop YW, Sl1, drop YW, Sl1; return next 3 sts to LH, twist RIGHT, k3 tbl; repeat, edge
Row 3: same as row 1
Edge, P1, YW, P1, YW, P1; repeat, edge
Row 4:
Edge, Sl1, drop YW, Sl1, drop YW, Sl1; return next 3 sts to LH, twist LEFT, k3 tbl; repeat, edge
Repeat Rows 1–4.
Abbreviation Guide
- Edge: Edge stitch (first and last stitch of the row)
- P1: Purl 1
- YW: Yarn wrap (extra wrap around needle)
- Sl1: Slip 1 stitch purlwise
- drop YW: Drop the extra yarn wrap off the needle
- LH: Left-hand needle
- twist RIGHT: Twist stitches to the right before knitting
- twist LEFT: Twist stitches to the left before knitting
- k3 tbl: Knit 3 stitches through the back loop
Notes
- The yarn wraps (YW) create extra length, allowing the stitches to be manipulated and twisted.
- Dropping the wraps forms the elongated structure that defines the zigzag effect.
- Blocking will help open up the texture and enhance the vertical lines.